Get Started
The following sections cover the initial steps to familiarize yourself with GameBus API.
What do I need to know beforehand?
 GameBus
First of all try to get all the information you need about the platform.
For more info please see: https://www.gamebus.eu/

Chrome has a very useful tool for developers (or anyone interested) that makes every HTTP request cycle made by the browser accessible in a very user-friendly way.
For more info please see: https://developers.google.com/web/tools/chrome-devtools/
To get a very good understanding of how the API does its magic requesting actions and getting data as response, Postman acts, let’s say, as your magnifying glass. Not only to see way better what’s going on, but to also easily make HTTP requests, get responses, and save them to be executed how many times you want.
For more info please see: https://learning.postman.com/
 Unirest-Java
A very easy to use lightweight HTTP client library.
Here’s an example of a GET request using Unirest-Java:
Unirest.get("http://httpbin.org")
        .queryString("fruit", "apple")
        .queryString("droid", "R2D2")
        .asString();

// Results in "http://httpbin.org?fruit=apple&droid=R2D2"
And for a POST:
HttpResponse<JsonNode> response = Unirest.post("http://httpbin.org/post")
        .header("accept", "application/json")
        .queryString("apiKey", "123")
        .field("parameter", "value")
        .field("firstname", "Gary")
        .asJson();
Some parts of this documentation rely on a very basic HTTP client/helper implemented on top of Unirest-Java.
For more info please see: https://kong.github.io/unirest-java/
How can I access the platform?
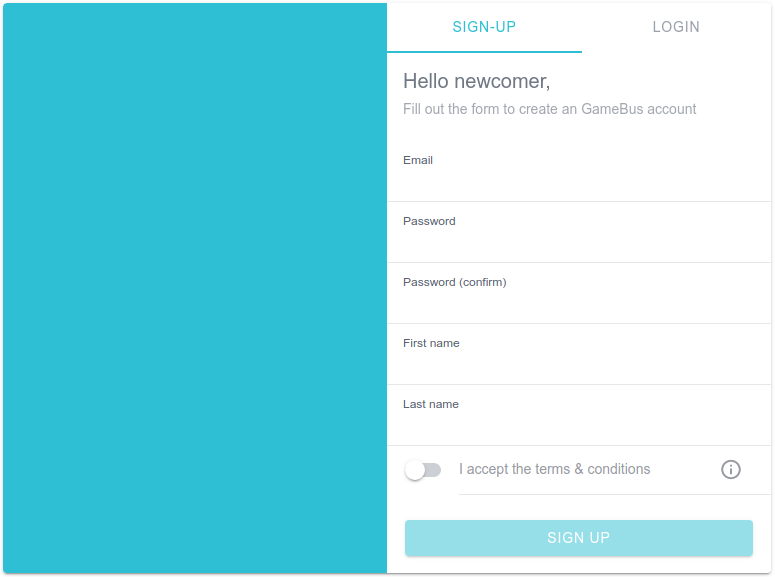
First step to act as a client is to create a GameBus test account via https://app3.gamebus.eu/ in order to have access to the API resources.
This address points to a test server, so make sure to use it as all data stored there is flushed regularly.
The sign-up screen:
That’s it!
Am I making requests already?
By using the application the user is already making a lot of requests, in other words, using the API. This can be easily seen with the help of Chrome Dev Tools.
To have a look at all the requests that are being made:
- Open Chrome Dev Tools with Ctrl+Shift+I
- Go to the Network tab
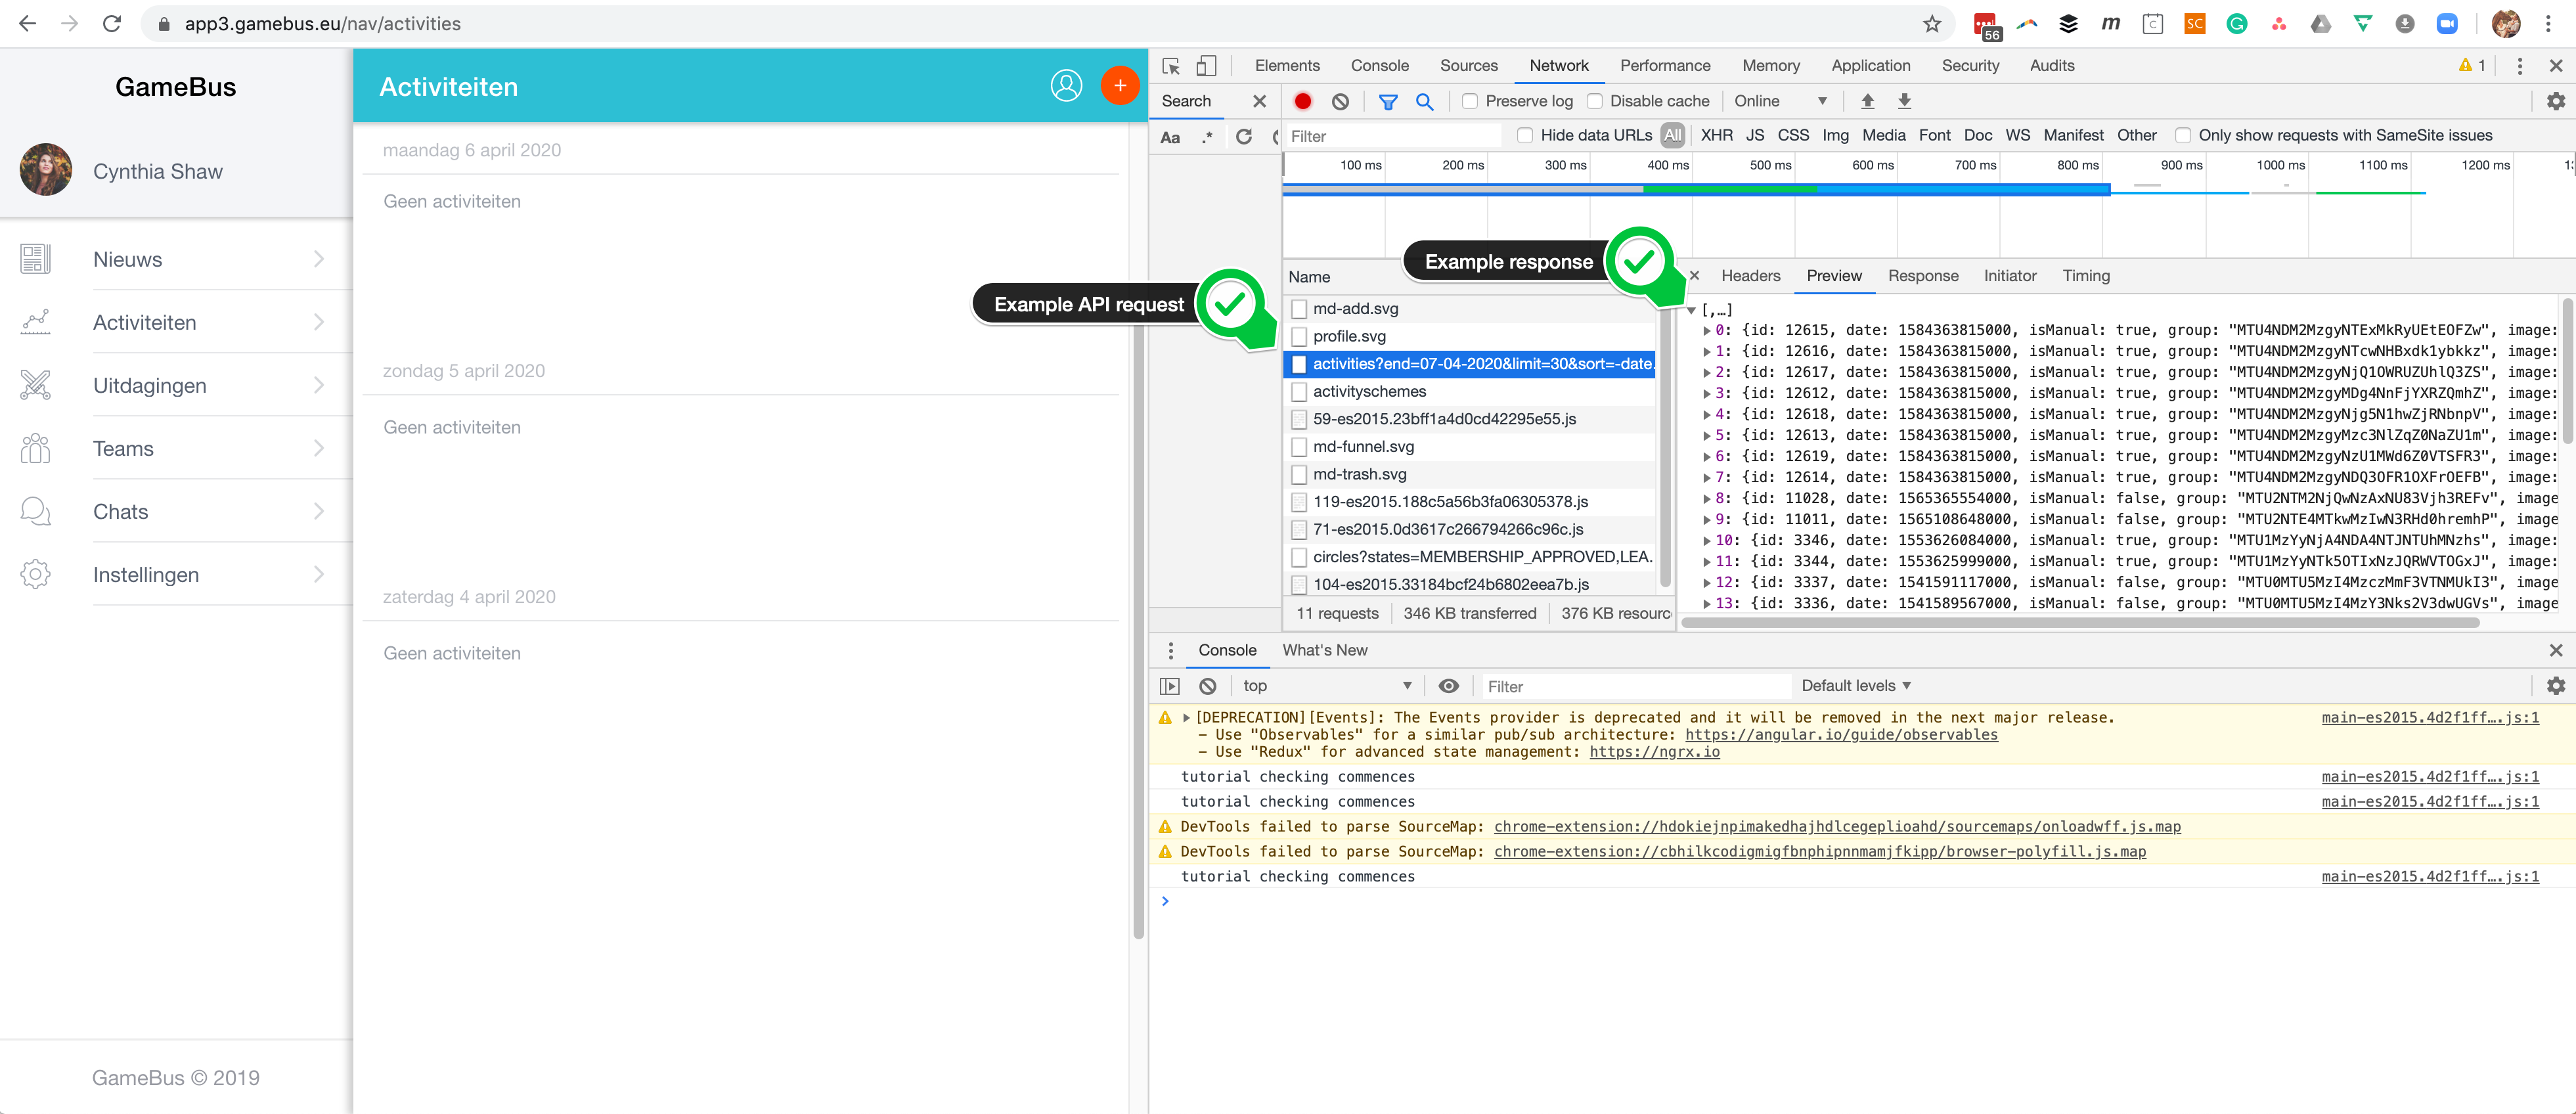
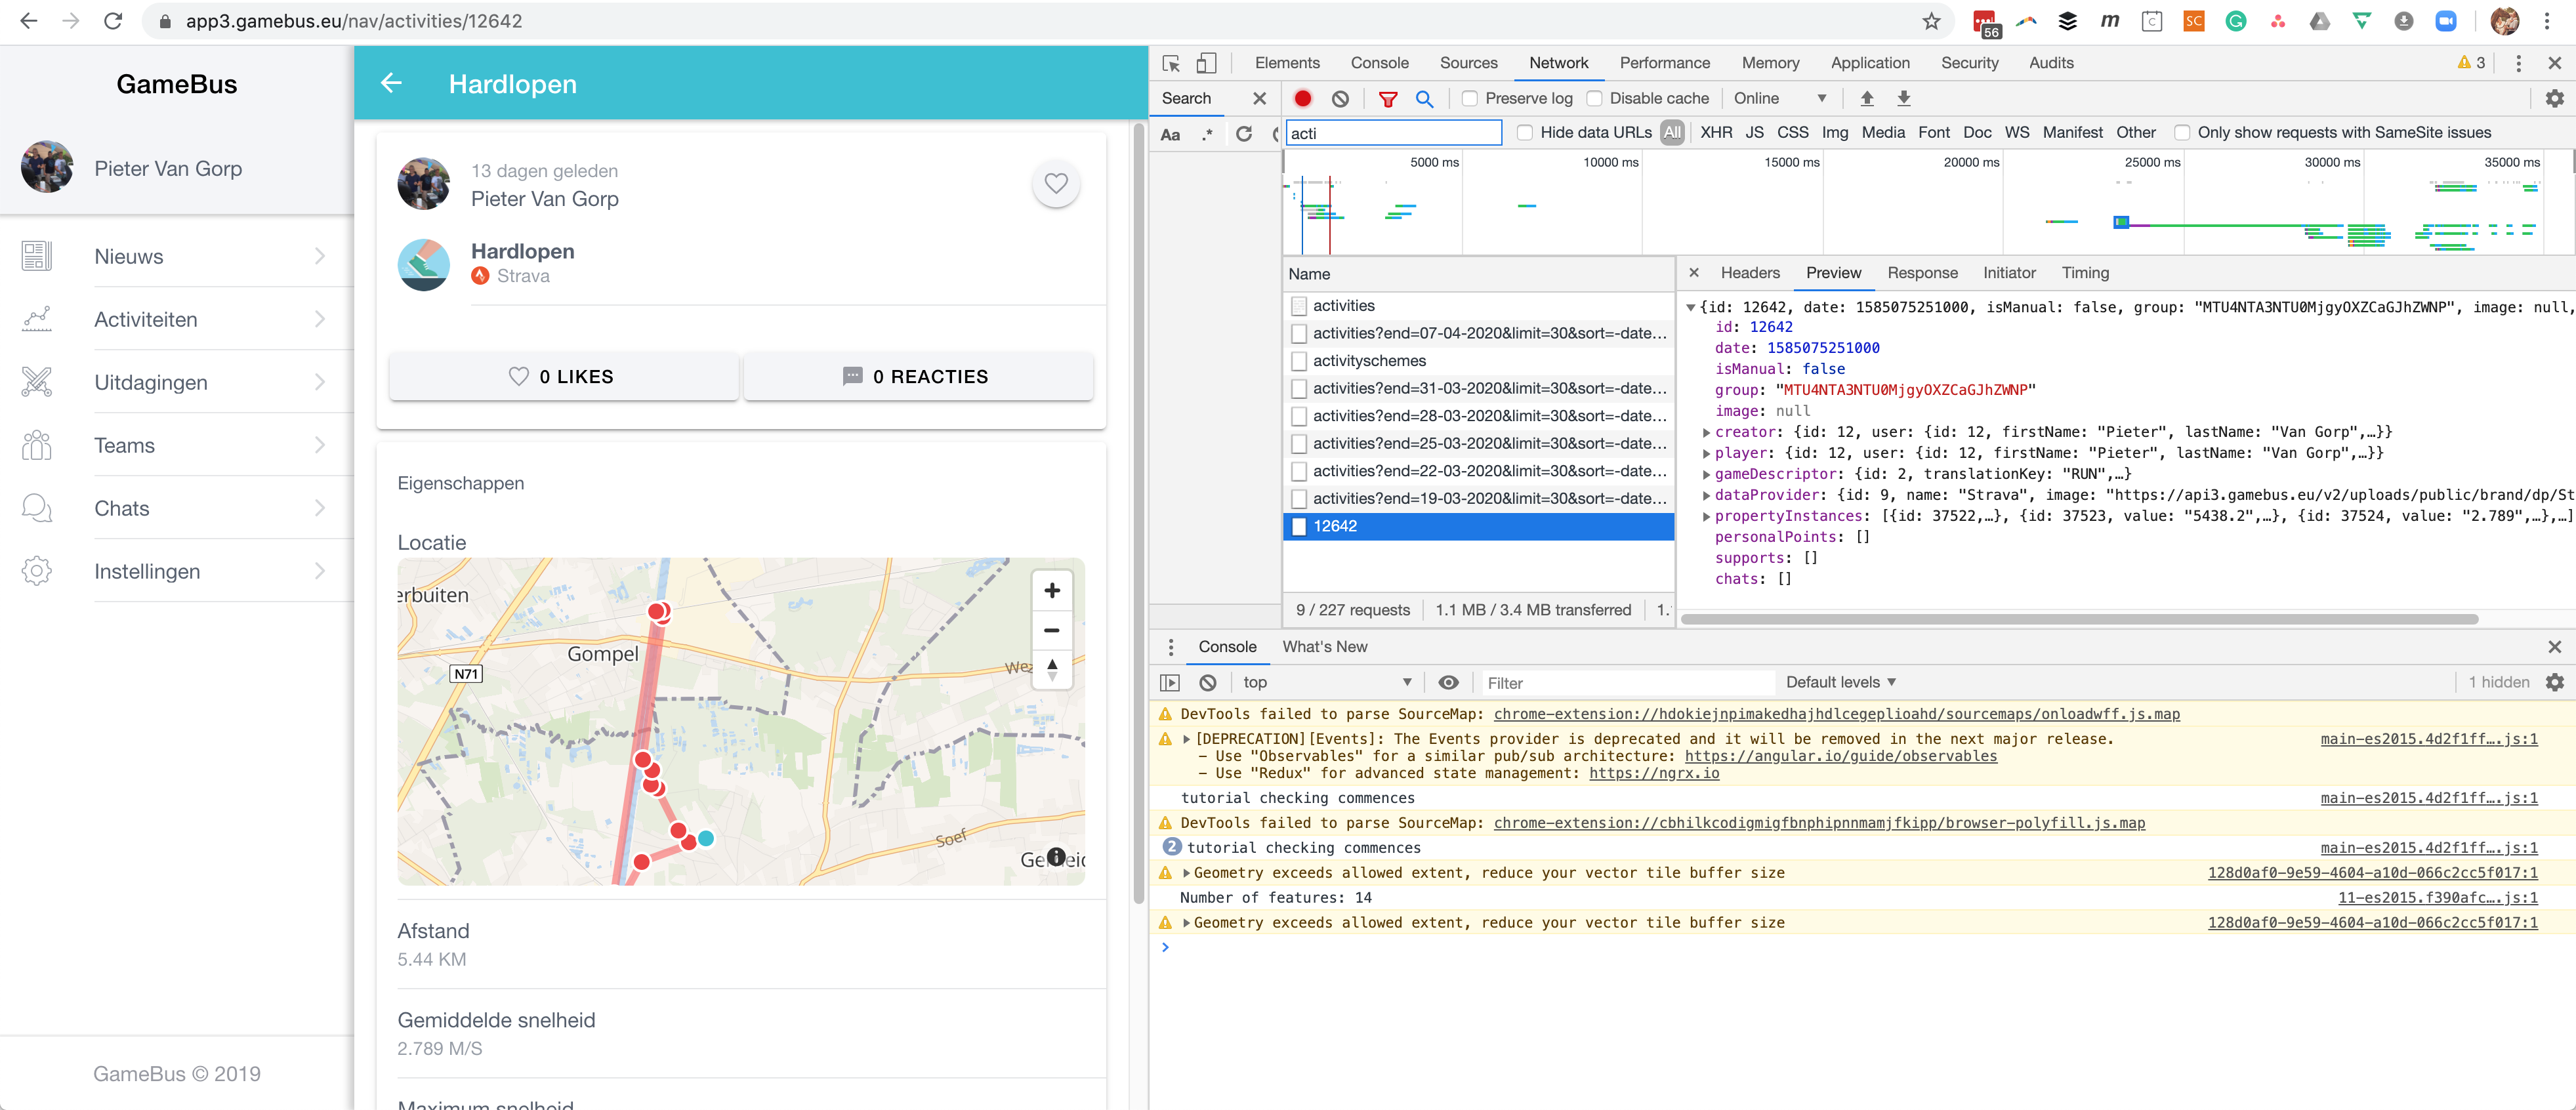
The Network tab displays information of all requests made by the browser. For every action that demands a client-server interaction the application will trigger one or more requests, and by selecting one of them the associated information will be displayed.
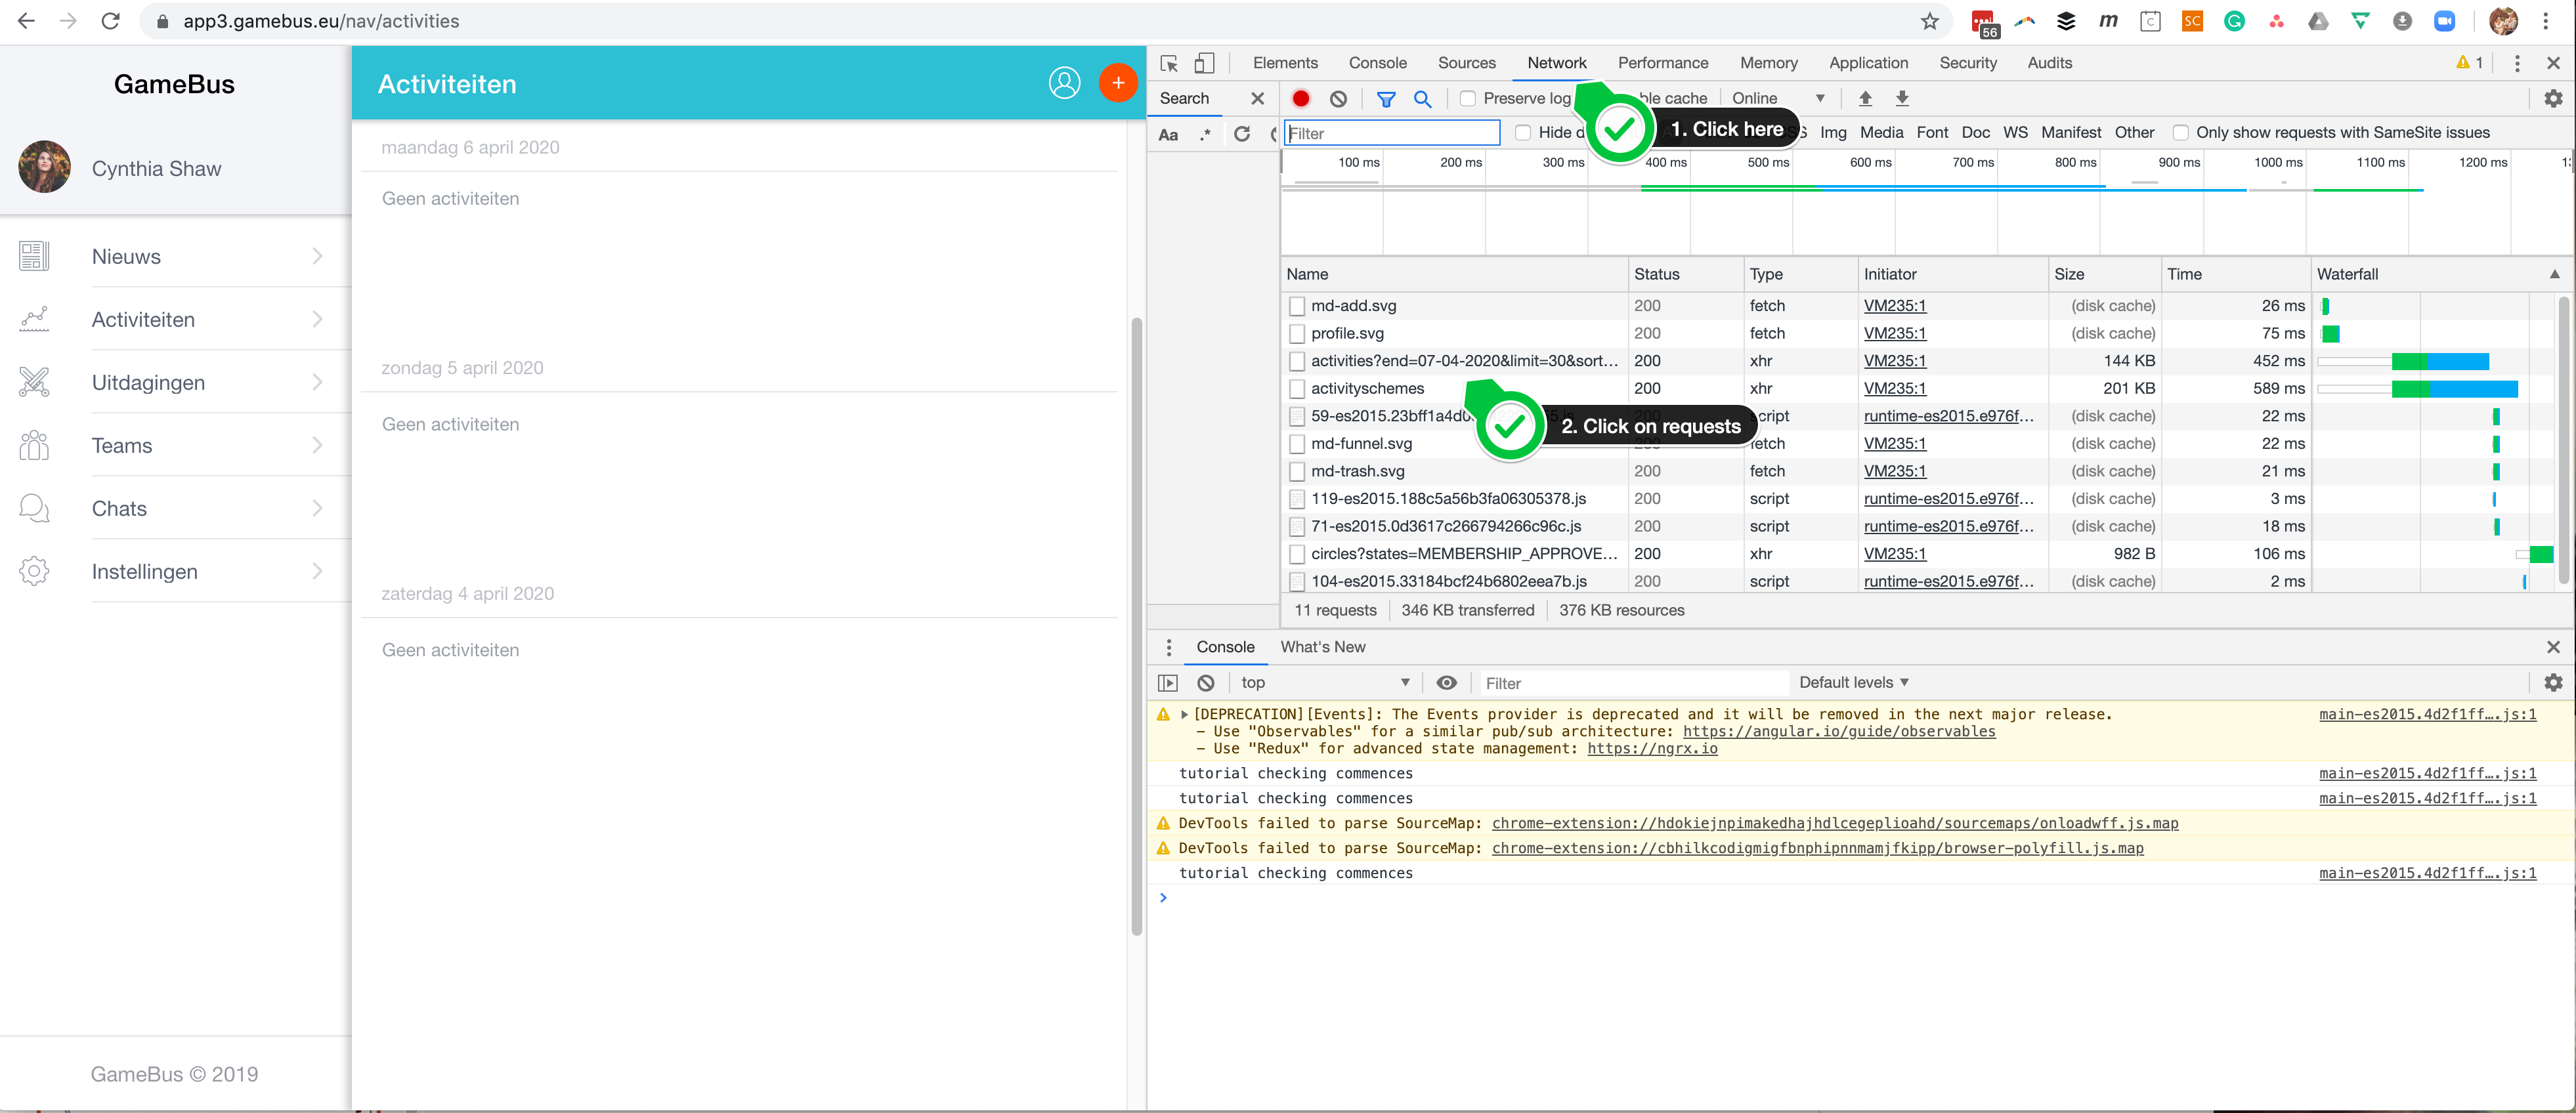
Information such as Headers and Response are very useful, and can give a good picture of what kind of request was made behind each action, and possible insights about the related data and resource used to retrieve it.
Ok, fine, but how can I make requests from outside the App?
That’s when Postman comes in handy. But first an authorization token must be known, as it’s going to be used by each created request coming from a client.
The token is a Bearer token in the form of: 71357b62-262d-4fa8-8a5c-ae8314abc5cb, and to access its value, Chrome Dev Tools can be used as well:
- Open Chrome Dev Tools with Ctrl+Shift+I
- Go to the Application tab
- Then: Storage > Local Storage > authuser
- Copy the authorization token value (
token) - Copy both user and player IDs (
uidandpid)
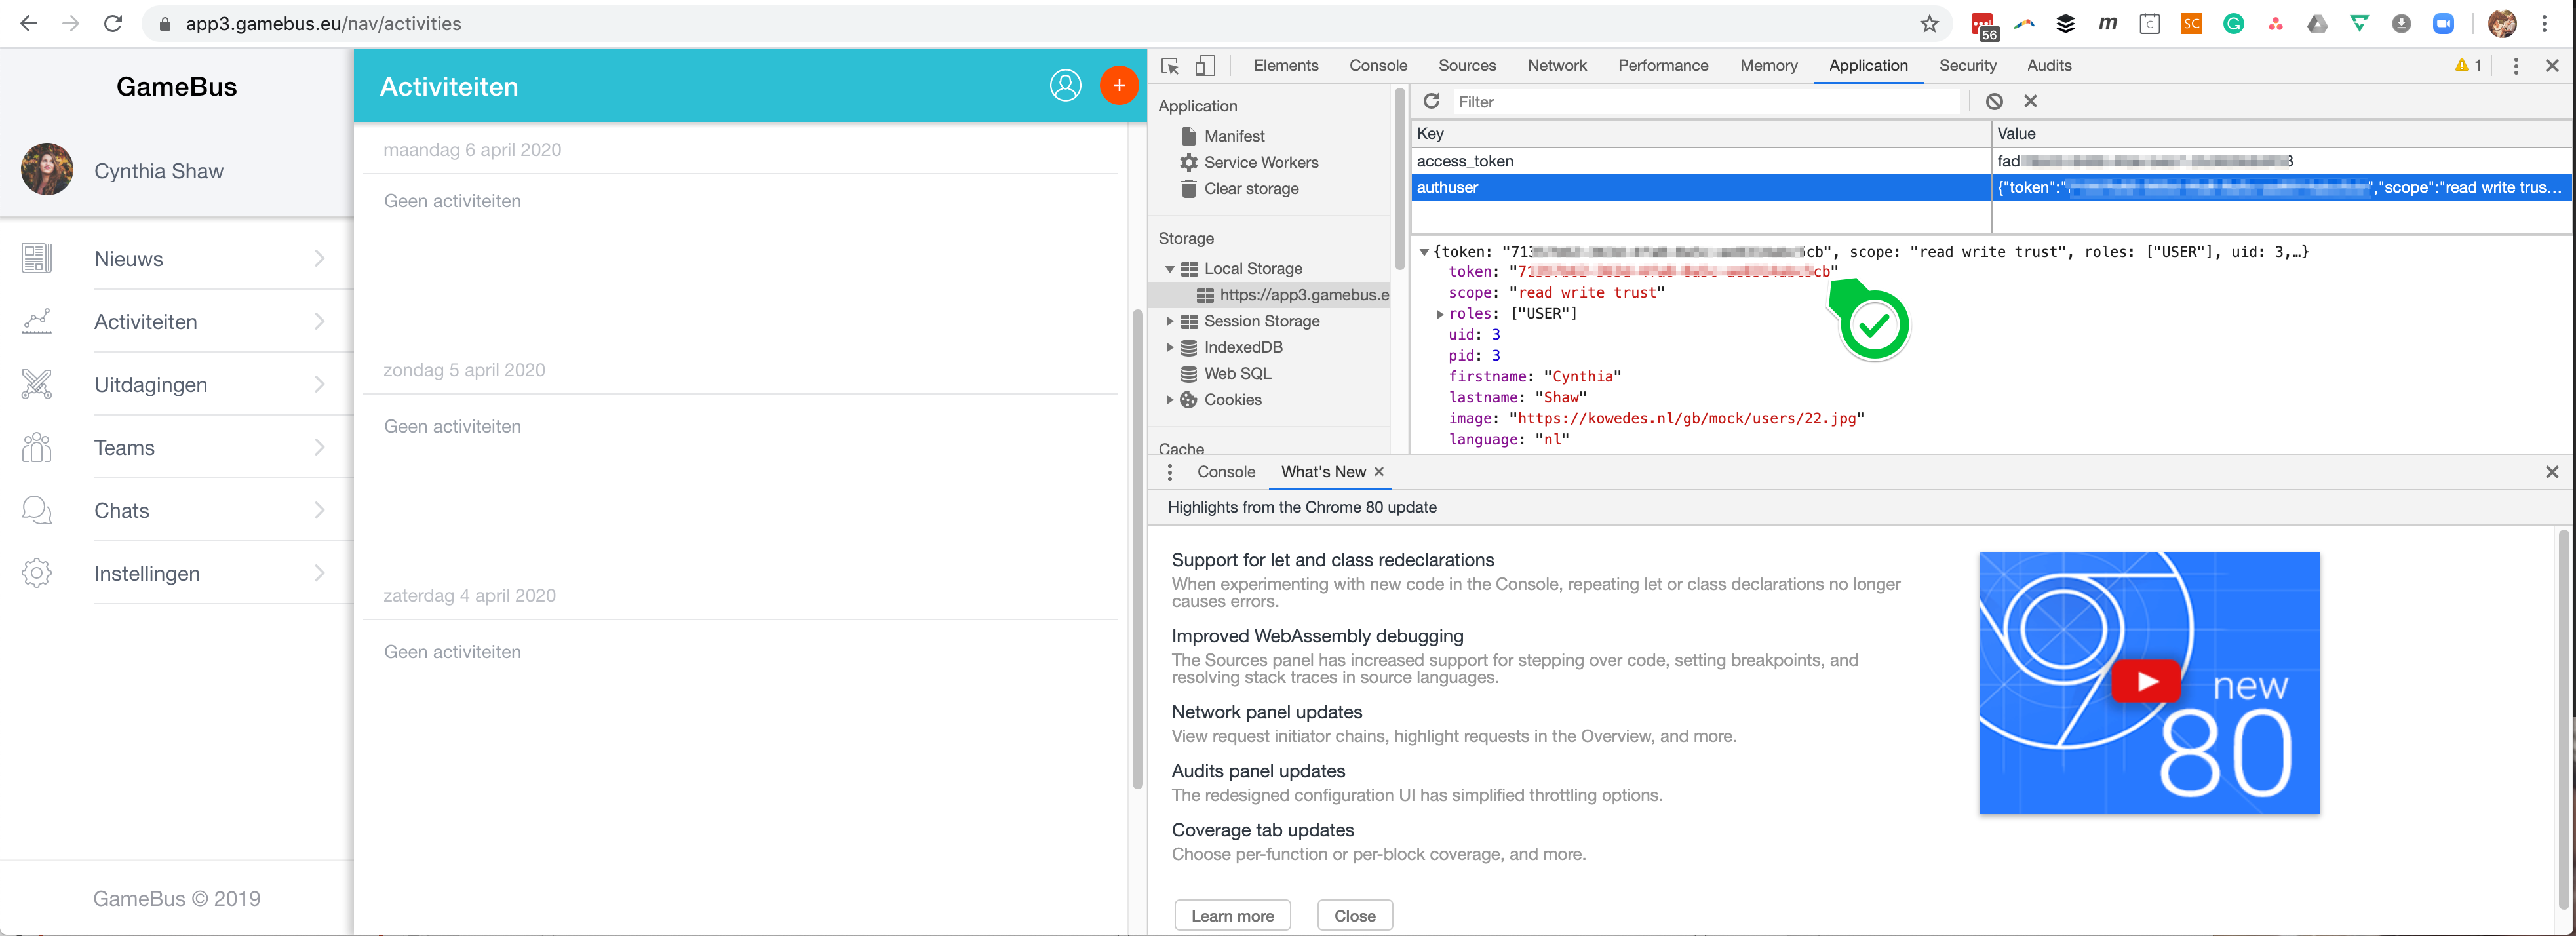
While listing existing activities on the application, one can note that the request used to retrieve and list existing activities is similar to:
/players//activities
and that a real player.id value is there, leading to something like:
/players/123/activities
Now on Postman a GET request can be made like:
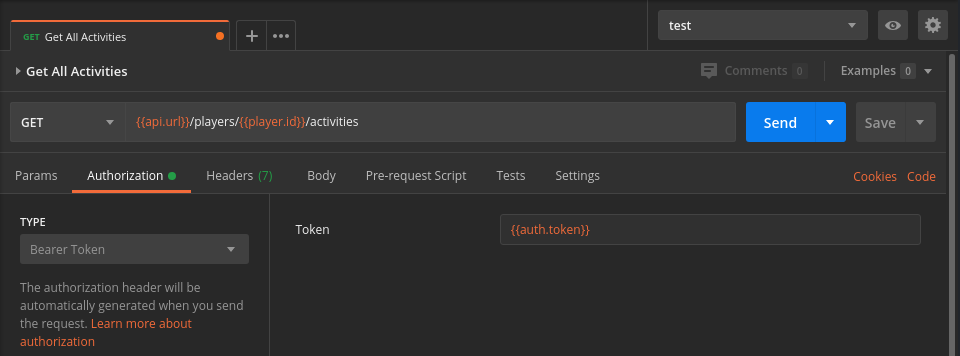
where must be replaced by its real value, and both and `` by the previously copied values for authorization token and player ID, respectively. By sending the request a response similar to the one displayed by Chrome Dev Tools will be received.
It is important to mention that the previous request is part of the Postman collection included in this Wiki, as well as the mentioned variables (,, ``) that are part of the also included Postman environment. Please use the links bellow to download both:
Postman collection: Open the JSON file
Postman environment: Open the JSON file
and be sure to set the existent environment variables with your own values.
For more information about Postman collections and environments:
